Letsencrypt Wildcard SSL-Zertifikate mit Cloudflare-DNS-Challenge und dynamischen Nginx-vHosts (Debian 8/ Jessie)

Überblick:
- certbot-auto
- dns-cloudflare plugin
- CloudFlare API
- nginx dynamische vhosts
Schritt 1 – certbot deinstallieren
Wenn installiert, certbot deinstallieren
sudo apt-get remove certbotSchritt 2 – certbot-auto installieren (https://certbot.eff.org/)
https://certbot.eff.org/lets-encrypt/debianjessie-nginx
cd /root
wget https://dl.eff.org/certbot-auto
chmod a+x certbot-auto
Schritt 3 – certbot plugin installieren (certbot-dns-cloudflare)
Details: https://devops.stackexchange.com/questions/3757/how-to-install-certbot-plugins
Plugins checken:
./certbot-auto pluginsZu certbot-auto Installationsort wechseln und mit pip Plugin installieren
cd /opt/eff.org/certbot/venv
source bin/activate
pip install certbot-dns-cloudflare
deactivate
Plugins erneut kontrollieren:
./certbot-auto plugins- - - - - - - - - - - - - - - - - - - - - - - - - - - - - - - - - - - - - - - -
* apache
Description: Apache Web Server plugin - Beta
Interfaces: IAuthenticator, IInstaller, IPlugin
Entry point: apache = certbot_apache.entrypoint:ENTRYPOINT
* dns-cloudflare
Description: Obtain certificates using a DNS TXT record (if you are using Cloudflare for DNS).
....
* nginx
Description: Nginx Web Server plugin
Interfaces: IAuthenticator, IInstaller, IPlugin
Entry point: nginx = certbot_nginx.configurator:NginxConfigurator
* standalone
Description: Spin up a temporary webserver
Interfaces: IAuthenticator, IPlugin
Entry point: standalone = certbot.plugins.standalone:Authenticator
* webroot
Description: Place files in webroot directory
Interfaces: IAuthenticator, IPlugin
Entry point: webroot = certbot.plugins.webroot:Authenticator
- - - - - - - - - - - - - - - - - - - - - - - - - - - - - - - - - - - - - - - -Schritt 4 – Cloudflare API Zugangsdaten
Details:https://bjornjohansen.no/wildcard-certificate-letsencrypt-cloudflare
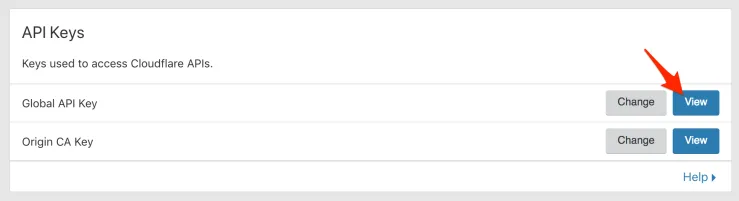
Datei erstellen mit API Key:
dns_cloudflare_email = "youremail@example.com"
dns_cloudflare_api_key = "4jg3252352sfsdffghfjghfjg6252522352cbcab4"
zb /root/.secrets/cloudflare.ini
Berechtigungen:
$ sudo chmod 0700 /root/.secrets/
$ sudo chmod 0400 /root/.secrets/cloudflare.ini
Schritt 5 – Zertifikat anlegen
cd /root
./certbot-auto certonly --dns-cloudflare --dns-cloudflare-credentials /root/.secrets/cloudflare.ini -d *.example.com --preferred-challenges dns-01
Schritt 5 – nginx vHosts (dynamisch)
Ordnerstruktur für *.example.com
/var/www/example.com/subdomain/*/public
server {
    listen 80;
    #listen [::]:80;
    server_name *.example.com;
    return 301 https://$host$request_uri;
    }

server {
    listen 443 ssl http2;
    ssl on;
    #listen [::]:443 ssl spdy;
    server_name ~^(?<subdomain>[^.]+).example.com;


    # Letsencrypt
    ssl_certificate /etc/letsencrypt/live/example.com/fullchain.pem;
    ssl_certificate_key /etc/letsencrypt/live/example.com/privkey.pem;
    # Cipher
    ssl_protocols TLSv1 TLSv1.1 TLSv1.2;
    ssl_prefer_server_ciphers on;
    ssl_ciphers "EECDH+AESGCM:EDH+AESGCM:AES256+EECDH:AES256+EDH";
    ssl_dhparam /etc/ssl/private/dhparam.pem;
    ssl_ecdh_curve secp384r1;
    ssl_session_cache shared:SSL:10m;
    ssl_session_timeout 10m;

    #OSCP
    ssl_stapling on;
    ssl_stapling_verify on;
    resolver 8.8.8.8 8.8.4.4 valid=300s;
    resolver_timeout 5s;
    ssl_trusted_certificate /etc/letsencrypt/live/example.com/chain.pem;

    #Document-Root
    root /var/www/example.com/subdomain/$subdomain/public;
    index index.html index.htm index.php;

    location / {
        try_files $uri $uri/ =404;
    }

    location ~ \.php$ {
        try_files  $uri  =404;
        fastcgi_split_path_info ^(.+\.php)(/.+)$;
        fastcgi_pass unix:/var/run/php5-fpm.sock;
        fastcgi_index index.php;
        include fastcgi_params;
        fastcgi_param HTTPS on;
        fastcgi_param SCRIPT_FILENAME
        $document_root/$fastcgi_script_name;
        fastcgi_intercept_errors on;
    }